Into The Hive Sentries Tier List
S–C job profiles for choke hold, extract rear guard, nest-room cover, and mobile poke—token priority included.
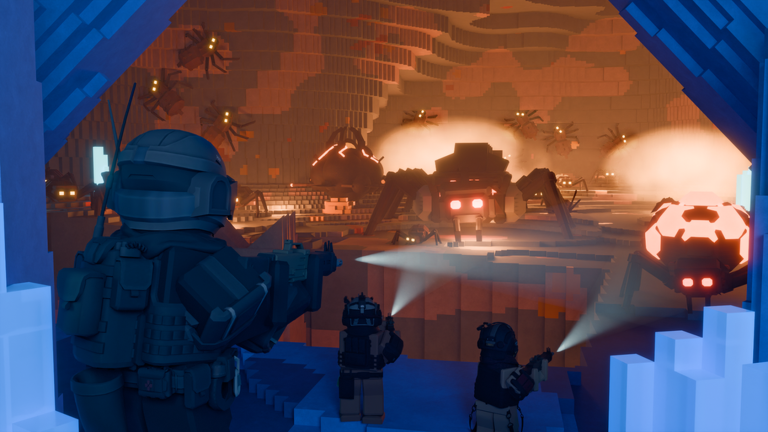
Sentries are the quiet carry of Into The Hive. Guns win highlight clips; deployable turrets win extracts when magazines run dry and the ceiling drops insects on your reload. This page ranks sentry roles—not invented shop model names—so you can score whatever the Equipment menu shows after a patch. Use the same S/A/B/C scale as the weapons list, then lock a kit on loadouts and buff uptime with augments. Start from the Tier List Hub if you are still deciding gun-versus-turret spend order.
Finish the Rusty intro, redeem free tokens from codes, and read Getting Started before you empty your wallet on a fragile novelty turret. Tokens buy guns, sentries, throwables, and Augments; a bad first sentry purchase slows every cave after.
Shared S–C scale for turret jobs
- S — Multi-role winners. Hold a choke, still matter on extract, and forgive imperfect placement.
- A — Reliable mains. Strong in one or two jobs with a clear downside (setup time, fragility, narrow cone).
- B — Role tools. Shine on nest rooms or mobile pokes when a teammate covers the weakness.
- C — Early fillers or awkward kits. Fine to test after your gun and a solid A/S sentry exist.
Shop labels change. Job profiles do not. Re-score after patches instead of freezing an old ladder.
Job profile 1 — Choke hold (S–A target)
Mission: Face the main tunnel mouth so swarm packs die before they reach your reload animation.
S-tier choke profile: Fast target acquire on packs, durable enough to survive a short hold, efficient so you are not babysitting repairs every ten seconds. Place on high ground or just behind a doorway lip so insects enter the cone before they see your backline.
A-tier choke profile: Excellent damage or excellent uptime, but not both. Maybe slow to spool, or fragile if left in the open. Still excellent when a duo partner watches flanks while the turret faces the funnel.
B/C notes: Narrow cones that only work in one corridor type, or turrets that waste fire on already-dying bugs, drop to B or C for this job.
Habits that raise any choke sentry: cover the route you will retreat along, not only the objective; keep line of sight clear of debris you plan to shoot; redeploy after major wall breaks when topology changes.
Job profile 2 — Extract rear guard (S priority late run)
Mission: Face the path behind the squad during the leave described in How to Extract. Ceiling crawlers and late spawn packs punish teams that only aim at the exit marker.
S-tier extract profile: Survives the sprint window without constant babysitting, acquires threats from the rear cone quickly, and stays useful even if placement is slightly off-angle.
A-tier extract profile: Strong when pre-planted on a known retreat lane; weaker if you must redeploy mid-panic.
B-tier extract profile: Fine as a temporary peel tool, but too fragile or too hungry to trust as your only exit insurance.
C-tier extract profile: Dies before the first rear pack arrives, or faces the wrong way after a last-second wall break.
Call extract early enough that the rear-guard turret is already planted. Greedy sightseeing after the nest dies is how rear-guard jobs fail—see Common Mistakes for the pattern.
Job profile 3 — Nest-room cover (A–S on objective commits)
Mission: Protect the damage window while the squad focuses the nest. Pair with the push steps in Destroy the Nest and the turret-cover seat in Squad Roles.
S-tier nest-room profile: Holds the entry you are not facing, survives the aggro spike, and frees gunners to stay on the objective instead of peeling every crawler.
A-tier nest-room profile: Strong damage cone with a setup tax—plant before the loud pull, not after insects flood the chamber.
B-tier nest-room profile: Works in tight nests, folds in wide chambers. Bring when your layout is known and a teammate can babysit.
C-tier nest-room profile: Friendly-fire awkwardness in tiny rooms, or acquire rules that ignore the priority threat while you melt.
Pre-place rule: Turret first, breach second, damage third. Loud openings without cover turn nest rooms into wipe rooms.
Job profile 4 — Mobile poke (B–A specialist)
Mission: Short redeploys while the squad advances room to room—temporary cones that buy ten seconds of clear while someone reloads or scouts.
A-tier mobile profile: Fast deploy, acceptable acquire, low enough commitment that moving it does not feel like wasting a token.
B-tier mobile profile: Useful poke tool but clumsy under stress; better as a secondary habit than a primary unlock.
C-tier mobile profile: Long deploy animations or placement rules that punish repositioning. Leave these for experimentation after core jobs are funded.
Mobile poke never replaces a dedicated choke or extract sentry. Think of it as tempo, not foundation.
Token priority: sentries versus guns, throwables, Augments
Equipment Tokens are scarce. Use this spend order unless a patch wildly reshapes the shop:
- Gun first — Constant DPS multiplies every other tool. See weapons.
- Sentry second — Especially solo and duo. A turret is a second player when matchmaking is empty.
- Gun or sentry Augment third — Multiply the pieces you already take into caves; read augments.
- Throwables fourth — Burst for nest ignition and panic peels, not a substitute for a missing turret.
- Luxury / novelty last — Extra C-tier toys after clean extracts feel routine.
Squad purse mindset: Fund one excellent clear gun and one durable sentry package before four people buy mirrored magazines. Translate that into recipes on loadouts.
Solo bias: Over-invest in choke and extract profiles. You have no revive chain; the turret is your rear guard.
Four-stack bias: One player owns Anchor / turret cover. Others may skip personal sentries if the umbrella is real—but never leave the seat empty.
Placement checklist that moves ranks half a tier
- Face the threat lane you cannot personally watch.
- Plant before the loud moment (breach, nest commit, extract call).
- Prefer high ground or doorway lips over open floor center.
- Reclear sightlines after destructible walls change the room.
- Redeploy for extract instead of hoping the nest-room angle still covers the exit.
- Announce “sentry down” so the squad does not assume cover that no longer exists.
Solo versus squad scoring matrix
| Job | Solo bias | Squad bias |
|---|---|---|
| Choke hold | S mandatory | S/A on Anchor |
| Extract rear guard | S early leave | Shared; call owner |
| Nest-room cover | A if you can pre-place | S with focus fire |
| Mobile poke | B nice-to-have | A for pathfinder tempo |
Linking sentry ranks to real missions
- Learn the leave path on How to Extract so rear-guard placement is intentional.
- Time nest-room cover with Destroy the Nest.
- Assign who plants with Squad Roles.
- Spend free tokens from codes on gun → sentry before cosmetics of progression.
- Revisit the Tier List Hub after armory patches.
Patch hygiene
When To The Earth’s Core changes turret HP, acquire speed, or deploy rules, re-run one mission per job profile. Promote a former B choke if it suddenly tanks extract holds. Demote a fragile “high DPS” turret that dies before the nest window ends. The job names stay; the shop stickers move.
Master choke hold, extract rear guard, nest-room cover, and mobile poke first. Any new named sentry then slots into S, A, B, or C without rumor charts—and your extracts stop depending on perfect magazines alone.
Frequently Asked Questions
Quick answers for hive runs, codes, and loadouts.
Should I buy a sentry before throwables in Into The Hive?
Yes for most accounts. Buy a clear gun first, a durable sentry second, then Augments, then throwables. Sentries cover reloads and extract holds that explosives cannot sustain.
What are the main sentry job profiles?
Choke hold, extract rear guard, nest-room cover, and mobile poke. Rank shop turrets by how well they perform those jobs, not by unverified model rumor names.
Where should I place a turret for extract?
Face the rear and flank path you will retreat along, plant before you call the leave, and redeploy if a wall break killed the old angle. See the extract guide for timing.
Do solo players need sentries?
Strongly yes. A sentry is your second teammate for choke and rear guard when you have no revive chain.
How do sentries fit squad roles?
The turret-cover / Anchor seat owns default placements. Coordinate with squad roles so nest commits and extracts are never missing automated cover.
Where should I read next after this tier list?
Cross-check weapons and augments, build a kit on loadouts, then practice nest timing and extract with the matching guides.